Shaders
Getting started with Shaders in ViroReact.
As of version 2.52.0, ViroReact supports Shaders. Simply put, shaders are small programs that run on the GPU (Graphics Processing Unit). They determine how every pixel of your 3D objects is rendered on the screen.
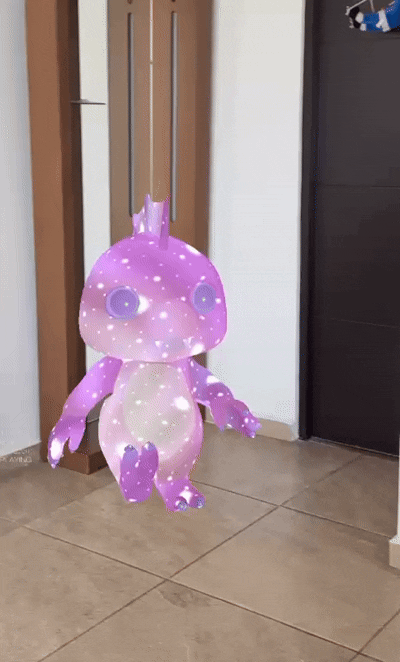
Here's Shaders in action:
Mental model
Shader modifiers let you inject small GLSL ES snippets into Viro’s built-in rendering pipeline. You do
not replace the entire shader. Instead, you modify specific structs (_geometry, _surface, etc.) at
well-defined stages.
In ViroReact, treat shader modifiers as a constrained extension mechanism: great for effects and
light deformation, but not a replacement for bespoke rendering pipelines.
Entry points you should actually use
Use these in production:
geometry- Pre-transform vertex edits. Use for waves, wobble, breathing meshes, displacement.
Because you move vertices, this affects depth testing/occlusion.surface- Material edits before lighting. Use for colour, alpha, rim/fresnel, scanlines, UV tricks,
texture blending.
Avoid fragments for the final colour. The compiled pipeline overwrites final fragment colour assignments, so
visual effects are unreliable there. Do colour work on the surface.
If you want unlit, predictable colours for effects, start with lightingModel: "Constant" and evolve
only if needed.
Precision qualifiers
GLSL ES requires explicit precision qualifiers on float types. In practice: always declare uniforms
and locals with lowp, mediump, or highp to prevent compilation failures.
Tip: keep precision consistent across expressions to avoid overload-resolution errors (for example,
passing a mediump value into a highp function chain).
Quick start: animated pulse material
Pattern: define a time uniform, then update it every frame (or on an interval). Scale milliseconds to
seconds inside GLSL.
import { ViroMaterials } from '@reactvision/react-viro';

ViroMaterials.createMaterials({
  rv_pulse: {
    lightingModel: "Constant",
    diffuseColor: "#4ADE80",
    shaderModifiers: {
      surface: "uniform highp float time; highp float t = time _ 0.001; // ms -> s
      highp float pulse = 0.5 + 0.5 _ sin(t); _
      surface.diffuse_color.rgb \*= vec3(pulse);
    }
  }
});
import React, { useEffect } from "react";
import { ViroMaterials } from "@reactvision/react-viro";

export function useShaderTime(materialName) {
	useEffect(() => {

		const start = Date.now();
		const interval = setInterval(() => {
			const elapsed = Date.now() - start;

			ViroMaterials.updateShaderUniform(materialName, "time", "float", elapsed);

			}, 16);

			return () => clearInterval(interval);

	}, [materialName]);
}
Apply the material to a node via materials={["rv_pulse"]}.
Geometry tutorial: waving flag
Use geometry modifiers to displace vertices. Also update normals if you want lighting to look correct.
ViroMaterials.createMaterials({
	rv_flag: {
		lightingModel: "Blinn",
		diffuseColor: "#FFFFFF",
		shaderModifiers: {
		geometry:
			uniform highp float time;
			uniform highp float wind_strength;

			highp float wave =
				sin(_geometry.position.x * 3.0 + time * 0.005) *
				cos(_geometry.position.x * 2.0 + time * 0.003) *
				wind_strength * _geometry.position.x * 0.1;

			_geometry.position.y += wave;
			_geometry.position.z += wave * 0.5;

			highp vec3 offset = vec3(0.0, wave, wave * 0.5);
			_geometry.normal = normalize(_geometry.normal + offset);

		}
	}
});
Drive both uniforms at runtime (time + wind_strength). Start with wind_strength ~1.0 and adjust.
Surface tutorial: rim / fresnel glow
Rim glow (fresnel) emphasises edges at grazing angles. This is a foundational block for holograms
and energy effects.
ViroMaterials.createMaterials({
	rv_rimGlow: {
		lightingModel: "Blinn",
		diffuseColor: "#FF6B9D",
		shaderModifiers: {
			surface: uniform highp float time;

			highp float pulse = 0.5 + 0.5 * sin(time * 0.003);
			highp float fresnel = pow(
				1.0 - dot(normalize(_surface.view), _surface.normal),
				2.0
			);

			_surface.diffuse_color.rgb *= pulse;
			_surface.diffuse_color.rgb += vec3(1.0, 0.4, 0.6) * fresnel * pulse;`
		}
	}
});
Texture sampling and binding
If you declare a custom sampler2D uniform, add the required sampler marker so the renderer binds
the texture.
ViroMaterials.createMaterials({
	rv_texBlend: {
		lightingModel: "Constant",
		shaderModifiers: {
		surface: // @sampler custom_texture
			uniform sampler2D custom_texture;
			highp vec4 tex = texture(custom_texture, _surface.diffuse_texcoord);
			_surface.diffuse_color *= tex;`
		}
	}
});
Precision and performance guidelines
Use the lowest precision that still looks correct (often mediump for colour math). Minimise texture
lookups. Avoid loops and heavy branching. Use discard sparingly.
Debug checklist
| Symptom | Likely cause | Fix |
|---|---|---|
| Effect does nothing | Material not applied | Ensure materials={["yourMaterial"]} is seton the node. |
| Shader fails to compile | Missing precision qualifier | Add lowp/mediump/highp to floats and float uniforms. |
| Object invisible | Alpha set to 0 or unintended blend | Inspect _surface.alpha edits and materialtransparency settings. |
| Colour changes ignored | Using fragment for final colour | Move colour logic to surface (and prefer Constant lighting). |
| Weird function errors | Precision mismatch | Make precision consistent across values and intermediates. |
New in v2.53.0
Custom sampler2D uniforms
Shader modifier code can now declare and receive uniform sampler2D inputs. Previously, sampler declarations in modifiers were silently ignored and the GPU always read texture unit 0. Now each named sampler is assigned its own texture unit and bound correctly at draw time.
ViroMaterials.createMaterials({
  noisyMetal: {
    lightingModel: "PBR",
    shaderModifiers: {
      surface: {
        uniforms: "uniform sampler2D noise_tex;",
        body: `
          float noise = texture(noise_tex, _surface.diffuse_texcoord * 3.0).r;
          _surface.roughness = mix(0.2, 0.9, noise);
          _surface.metalness = mix(0.4, 1.0, noise);
        `
      }
    },
    materialUniforms: [
      { name: "noise_tex", type: "sampler2D", value: require("./textures/noise.png") }
    ]
  }
});
ViroShaderUniform.type now accepts "sampler2D" and value accepts a require() image reference.
Runtime texture uniform update
ViroMaterials.updateShaderUniform now accepts "sampler2D" as a type, allowing any texture bound to a modifier sampler to be swapped at runtime:
ViroMaterials.updateShaderUniform(
  "colorGraded",
  "lut_tex",
  "sampler2D",
  isDaytime ? require("./lut_day.png") : require("./lut_night.png")
);
Custom varyings between vertex and fragment stages
A new varyings field on shader modifier entry points lets vertex-stage (Geometry) modifiers pass typed data to fragment-stage (Surface / Fragment) modifiers. Declare the same name in both stages; the engine injects out / in declarations automatically:
shaderModifiers: {
  geometry: {
    varyings: ["highp float displacement_amount"],
    uniforms: "uniform float time;",
    body: `
      float wave = sin(_geometry.position.x * 4.0 + time) * 0.1;
      _geometry.position.y += wave;
      displacement_amount = abs(wave) / 0.1;
    `
  },
  surface: {
    varyings: ["highp float displacement_amount"],
    body: `_surface.roughness = mix(0.1, 0.9, displacement_amount);`
  }
}
Scene depth buffer access
Fragment modifier entry points can set requiresSceneDepth: true to receive scene_depth_texture (sampler2D) and scene_viewport_size (vec2) automatically. Enables soft particles, contact edge glow, depth-based fog, and intersection effects.
On older Adreno/Mali GPUs that cannot sample the depth buffer in-pass, the engine automatically inserts a blit to a GL_R32F color attachment.
fragment: {
  requiresSceneDepth: true,
  body: `
    vec2 screenUV = gl_FragCoord.xy / scene_viewport_size;
    float sceneDepth = texture(scene_depth_texture, screenUV).r;
    float softFactor = clamp(abs(sceneDepth - gl_FragCoord.z) / 0.1, 0.0, 1.0);
    _output_color.a *= softFactor;
  `
}
Live AR camera texture access
Fragment modifier entry points can set requiresCameraTexture: true to sample the live AR camera feed on any geometry. Two uniforms are bound automatically: ar_camera_texture (the camera feed) and ar_camera_transform (a mat3 correcting for device orientation and aspect ratio).
The sampler type difference between platforms (samplerExternalOES on Android, sampler2D on iOS) is handled invisibly — developer GLSL is identical on both platforms.
surface: {
  requiresCameraTexture: true,
  body: `
    vec2 cameraUV = (ar_camera_transform * vec3(_surface.diffuse_texcoord, 1.0)).xy;
    _surface.diffuse_color = texture(ar_camera_texture, cameraUV);
  `
}
Enables magnifying glass, portal, refraction, warp, and camera-feed-on-geometry effects.
Deterministic priority ordering
VROShaderModifier now has a priority field (default 0). Multiple modifiers on the same material are injected in ascending priority order. Engine-internal modifiers (AR shadow, occlusion) use priority -100; user modifiers default to 0; debug overlays use 100. This prevents engine modifiers from interfering with user-defined effects regardless of attachment order.
Updated ViroShaderModifier type
export type ViroShaderModifier = {
  uniforms?: string;
  body?: string;
  varyings?: string[];               // pass typed data from vertex to fragment stage
  requiresSceneDepth?: boolean;       // auto-bind scene_depth_texture + scene_viewport_size
  requiresCameraTexture?: boolean;    // auto-bind ar_camera_texture + ar_camera_transform
};

export type ViroShaderUniform = {
  name: string;
  type: "float" | "vec2" | "vec3" | "vec4" | "mat4" | "sampler2D";
  value: number | number[] | ReturnType<typeof require>;
};
ReactVision conventions
Recommended defaults:
- start with surface + Constant lighting for effects,
- use a shared time uniform everywhere,
- validate on physical devices early,
- change one variable at a time
when debugging.
Updated 5 months ago